![]()
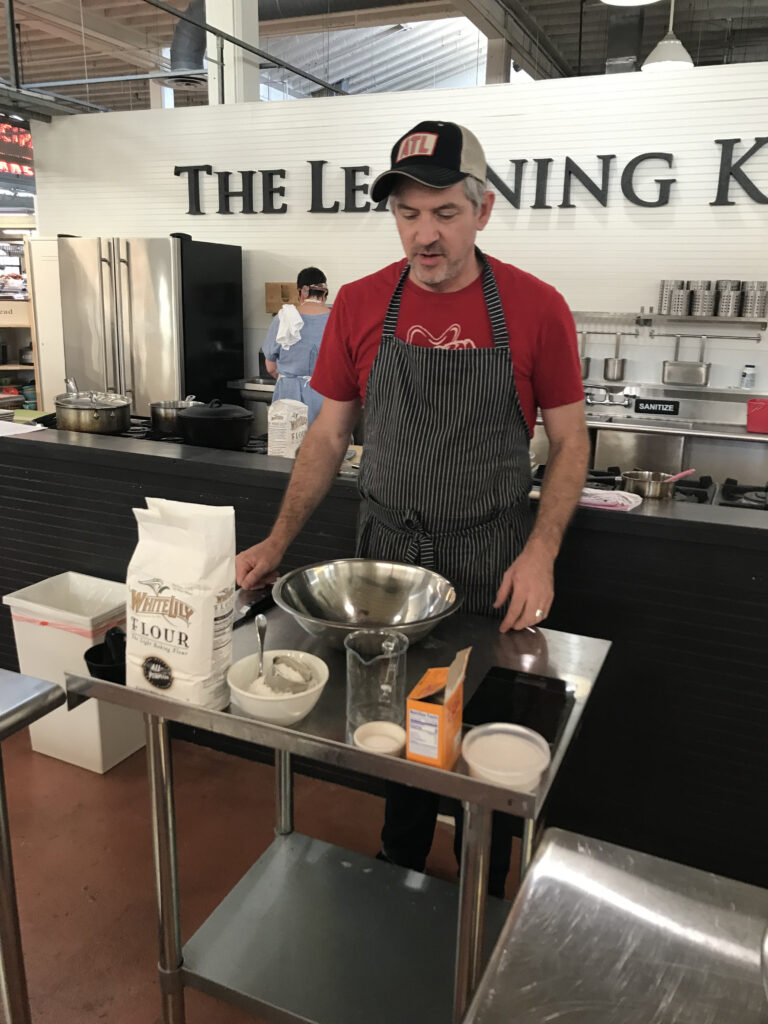
On a trip to Atlanta I was fortunate to take a class at The Learning Kitchen, a place owned by Beth Lord in the Sweet Auburn Curb Market. The Learning Kitchen has classes for both adults and children.
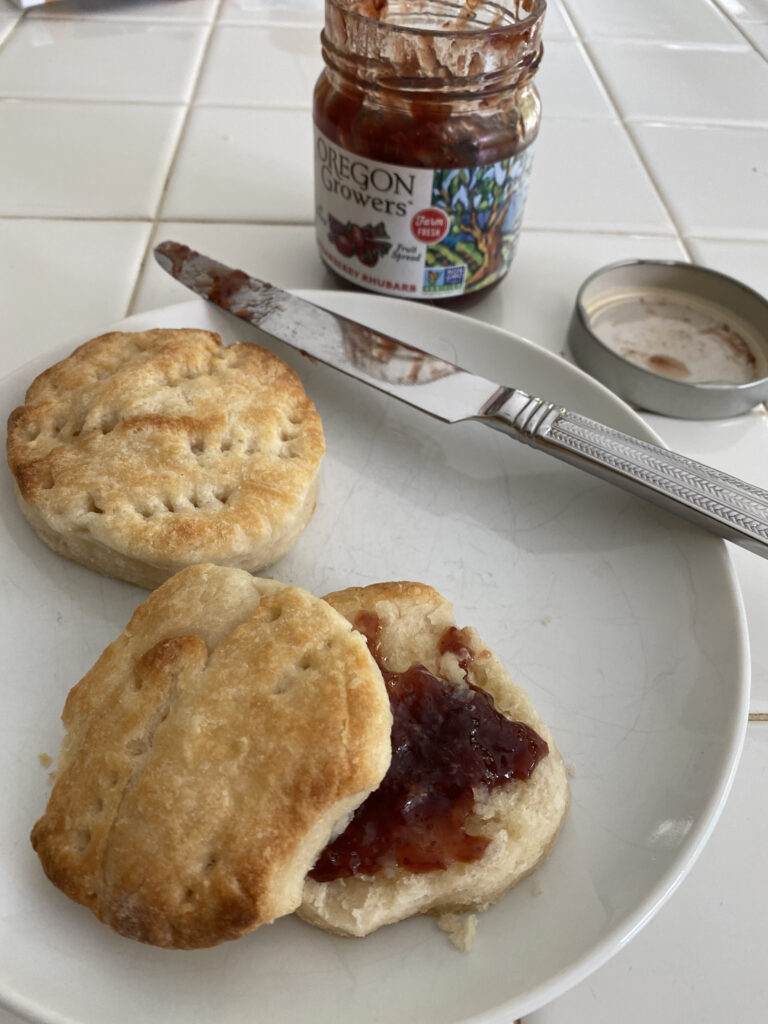
We were given a personal lesson on making amazing biscuits by Todd Tharp, owner of Hutchinson’s Finest. Having free time on my hands has given me a chance to make some of those recipes I have filed away for a rainy day, and the biscuit recipe I got from Todd was just the perfect comfort food to make.
Todd told us that he has a delivery service of his biscuits and homemade jams on Sunday mornings to Atlanta’s east side neighborhoods. He got the idea to make biscuits from his father who told him that when he was a boy, his mother used to make homemade biscuits two times a day. The grandmother would stick her finger in the center of the biscuit and fill it with butter and honey. Her last name was Hutchinson which is how Todd got the name of his business.
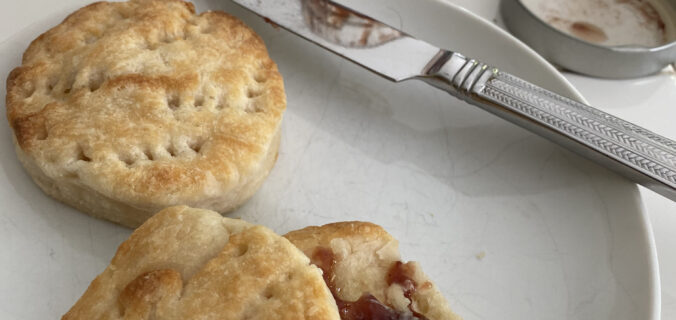
These biscuits are truly wonderful. I have made biscuits in the past, but some of the tricks taught to us by Todd are what makes them so delicious. One thing I learned was that when using the biscuit cutter, you never twist the cutter because that makes them tough. Another trick was that when you knead small pieces of butter into the flour mixture, it is good to still have some very small clumps of butter remaining. It really adds to the taste. He also does a lot of folding and reshaping and uses a fork to poke holes in the dough prior to cutting with the biscuit cutter. He cooks these biscuits at a very high temperature and turns the pan halfway through the baking cycle to make sure they are baked evenly.
If you are lucky enough to live in Atlanta on the east side, you can call Todd for delivery of his biscuits which come with his homemade jam. Besides the basic biscuits, he also makes cinnamon sugar and cheddar chive biscuits. *You can contact Todd at 404-539-4598 or on Facebook @hutchinsonsfinest, or through email at todd@hutchinsonsfinest.com.
In addition, he teaches a 2 ½ hour biscuit making class at The Learning Kitchen; once a month Todd and his wife prepare a Sunday Supper Social where participants make some of the dishes for the social and everyone eats together at a long table afterwards.

*At this time because of the Covid-19 virus, he isn’t delivering. Check his website or Facebook to see when he will resume delivery and classes.
Unfortunately, most of us aren’t able to order his biscuits, so I am attaching the recipe from Todd so that you can make your own. Have fun!
Hutchinson’s Finest Buttermilk Biscuits
4 ½ cups all-purpose flour (a soft winter wheat is great, like White Lily)
2 tsp. salt
1 Tbsp baking powder (or use 1 tsp. baking soda and 2 tsp. cream of tartar)
12 Tbsp butter
1 ¾ cups buttermilk
*An additional 2 Tbsp melted butter for brushing tops of biscuits
**An additional 1 cup of flour for dipping fork and cutter into
Procedure
- Position oven racks to use the middle or top half of the oven and preheat to 500 degrees. Melt the additional 2 Tbsp of butter for brushing the tops of biscuits and set aside. Add the additional cup of flour to a small bowl and set aside.
- Add the flour, salt, and baking powder to a large mixing bowl and mix together with a whisk.
- Slice butter into thin pieces. Take half of the sliced butter and add to the flour. Work the butter into the flour by flattening it with your fingertips. This process should be fairly quick and take about 30 seconds to a minute. Add the rest of the butter to the flour mixture and break apart and flatten any large butter pieces and toss together with the flour mixture.
- Pour the buttermilk over the top of the flour mixture. Using your spatula, fold the flour and buttermilk together. You want to do this until both are combined, and you have a shaggy dough with hardly any dry bits of flour left in the bowl.
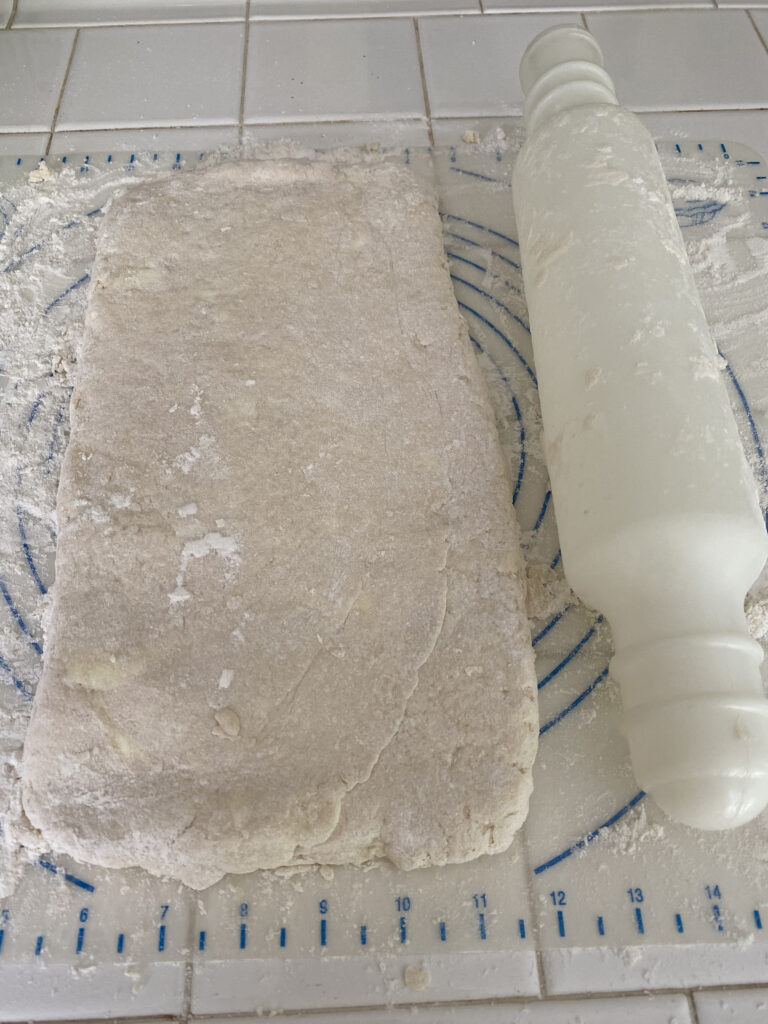
- Liberally dust a work surface and turn the dough onto it. Gently shape the dough into a ball shape and flip over. Re-flour the work surface if needed. Using a rolling pin, roll the dough into a rectangular shape about an inch think. Fold the top third of the dough on top of the middle third, and then fold the bottom third up over the middle and top third, much like you would a letter. Turn the dough 90 degrees and roll out again into a rectangular shape about an inch thick and repeat the folding steps. Turn the dough 90 degrees and repeat the rolling out and folding step one last time.
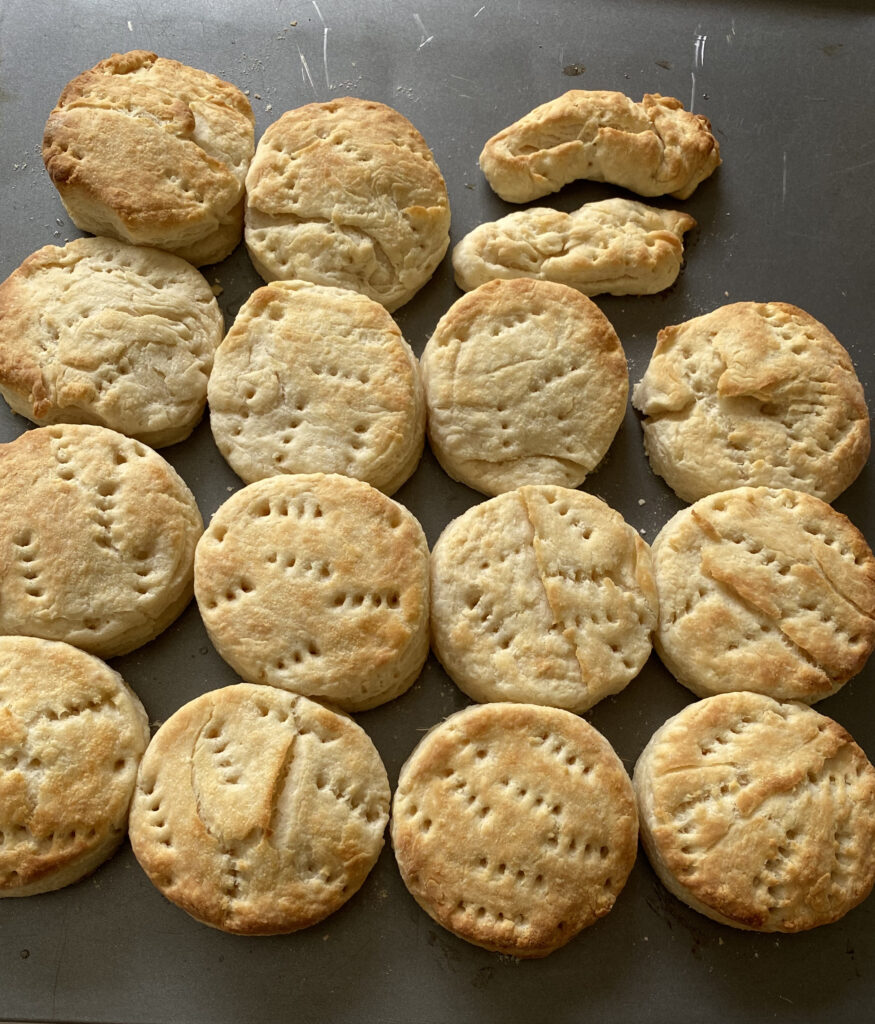
- At this point, the dough should feel a little stiffer and have a little more structure. Re-flour the work surface and rolling pin if needed. Roll the dough out again until about an inch thick. Using a fork, dip it into the additional flour and poke holes in the dough all over going all the way through to the work surface. Using your biscuit cutter, dip it in flour and then press straight down through the dough (never twisting the cutter.) Move the cut biscuit over to an ungreased sheet pan. Cut the remaining biscuits, moving them to the sheet pan and placing them where they almost touch.
- Take the leftover dough and gently work into a circle/ball again. Turn the dough onto its side and repeat Step #6. After this, don’t reroll the dough again. Take any scrap pieces and arrange them on the sheet to bake with the biscuits.
- Place the biscuits in the oven on the middle or top rack and bake for 14 minutes. Set the timer for 7 minutes to turn the biscuits halfway through the process to promote even baking and browning. Once the biscuits are done, remove from the oven and brush with melted butter.
- Enjoy!